Posted on
Update: The Tour Auto submodule was added to Tour for automatic launching of a tour with per user controls.
Tour was deprecated in Drupal 10 and removed in Drupal 11.0. I was fine with that as I had not used it before, but I recently needed a tour for an upcoming launch of an intranet. Tour kinda blew my mind with its easy setup and out of the box look and feel. Now I think I want to use it on every project.
Getting started with Tour
Install tour as you would on any Drupal instance:
composer require drupal/tour
drush project:enable tour
Once you've installed Tour, it's time to set permissions for who is able to see the tours you create.
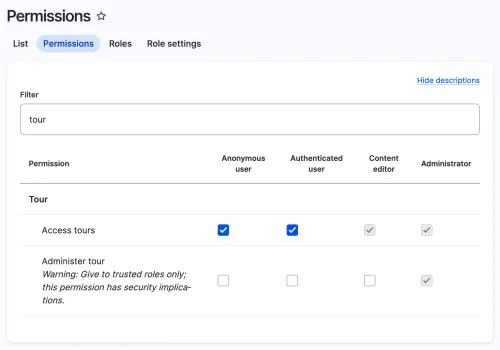
In this example, I have set access to tours for both anonymous and authenticated users.
Creating your first tour
Now that we've set permissions for seeing tours that are created, we can start creating our first tour.
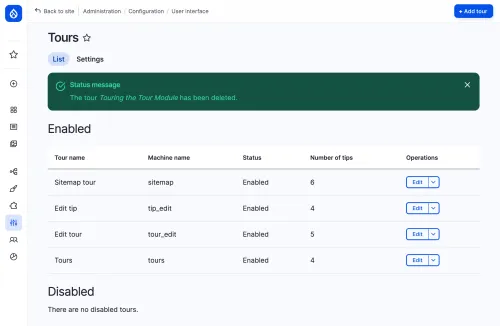
By default, Tour creates a number of default tours. If you are like me, you'll probably want to disable these tours after viewing them yourself the first time. They are helpful to understand the Tour module, but they are a bit of a distraction after you understand the tool. Similarly, you may see tours that have been added by other modules. For instance, on a recent project, I found a number of enabled tours from contributed modules I was using like the Search API module. Personally, I know Search API pretty well, so these were a bit of a distraction. They are a great way to learn new modules as a new site builder, but I worry a little that they are not quite as valuable as good documentation.
Defining where the tour will appear
Now it's time to create your first tour. When you click "Add tour", you can give your tour a name and assign it to routes on your Drupal site. Routes are not intuitive if you haven't used them before. They can be simple like <front> for the front page of your site, or more complex like a node route:
entity.node.canonical
- node:144
In the example, I'm placing the tour on a specific blog post—this very one! For that I want the canonical route to a content entity (node) and need to pass it the node ID as a parameter.
Every administrative form, view display and entity in Drupal has a route. There is no way you'll know every route, so you can use either the Devel module (developer tools) or the integrated route finder from the Tour module.
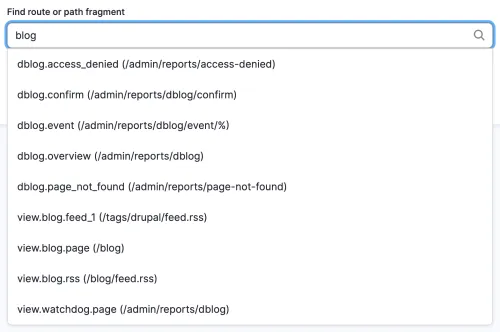
So handy!
Creating tips
Tips are a step in a step by step tour. By default, Tour ships with a text plugin for tips.
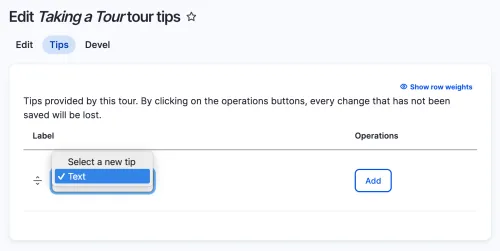
You can write your own plugin for tips and add them to a custom module. An example of a tip plugin for images is included in the Tour module's tests. Other helpful tip types would be something like videos or audio.
Positioning tips
Each text tip has a title, weight (which determines order), selector (optional), and body. If you do not give a tip a selector, it will appear in the middle of the screen. When given a selector, a class or ID usually, you can determine where the tip will appear in relation to the selector.
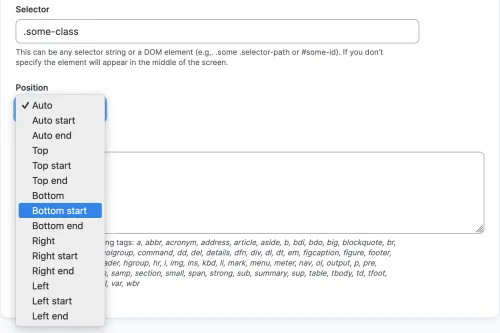
While there are a lot of options to position the tip, I personally found the auto option to be less than ideal. I places the tip over the top of the element with the selector class or ID. In practice, I found you need to test your position choice thoroughly on a range of display sizes.
The Tour button
For users to be able to see a tour, you'll need to place the tour button on the appropriate pages.
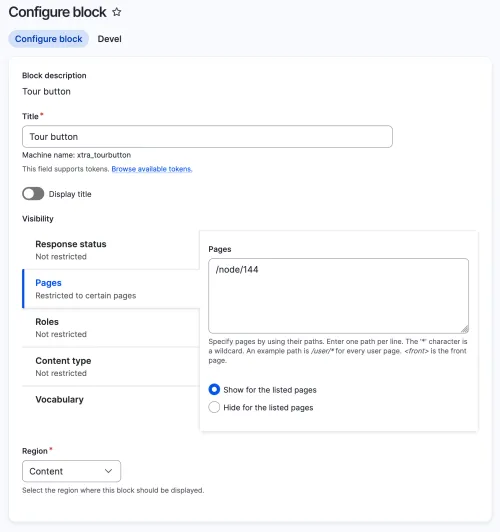
In this example, I'm restricting it to the node (this post) where the tour should appear. If you don't restrict the tour button, it will appear on all pages and display "No Tour" as the button text. (I can't think of a reason anyone would want that.)
Usage
The interface for creating tour tips is simple and quick to use. If you want to export your tour, for instance if you maintain a contributed module and want to include an optional tour for your functionality, you can enable configuration synchronization and export individual tours as a single config file.
I recently added a tour to an intranet that was about to launch and replace a much less robust site for government employees. The new site has the ability for an employee to follow groups to customize their news and events as well as favorite content for easy access. The search and navigation were significant better than the old site. By adding a few linked tours, I was able to walk them through the basics of the new site when they first visited the page.
At the time of writing this post, the Tour module does not yet support automatically opening tours.ksenzee posted an issue with some sample code for a Tour Auto submodule that I was able to repurpose for my intranet example. With that submodule, javascript automatically opens a tour for the first visit to any page with the tour button and an active tour. If allowed by permission, users can edit whether tours open automatically as part of editing their profile. They can also choose to reset their cookie for auto-starting tours. The day I posted this, I also took the time to restructure the Tour Auto code and contribute it back. I'm happy to say that my merge request made it into Tour 2.0.12. Woot!
Need help guiding people around your complex website? Connect with me on LinkedIn or reach out to me on Drupal Slack (@joshuami).